User Account Management
Last updated: April 26, 2023
Administrators have the option to manage their Portal's User Accounts by updating, disabling, transferring or deleting them. EventBuilder offers flexible subscription plans, allowing Administrators to adjust the number of Users as needed.
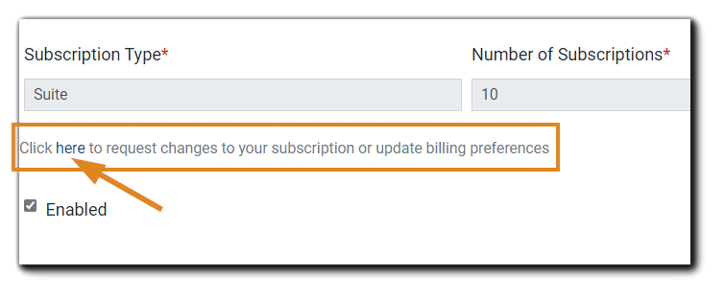
Note: To add or remove the number of subscriptions available on your Portal, please email care@eventbuiilder.com , linked at the bottom of the General tab in Portal Configuration.
Subscription and Billing Change Requests
Click the link shown above to email EventBuilder's Customer Care Team to request changes to your billing and/or subscription preferences. Our Care team will notify you when your Portal has been updated. Once notified that your changes have been implemented, return to your Portal Dashboard.
Accessing User Accounts
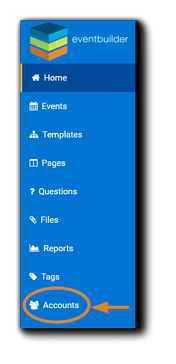
From your Portal Dashboard, select Accounts from the left navigation:
Adding a User Account After Subscription Change
To add a User Account after adding a subscription to your service, please refer to Adding and Setting Up Portal Accounts.
Disabling a User Account
Administrators may find they need to disable a User Account after a personnel change or decreasing the number of subscriber accounts on their Portal.
Note: Active Events and associated Event information connected to a user's account remain active after the User Account has been disabled. Portal Administrator(s) can access and manage all Events and information previously associated with the disabled account.
To disable a User Account, select the User from the Accounts list:
 After selecting the User whose account you wish to disable, their User Profile will open. At the bottom of the User Profile, deselect the 'Enabled' checkbox.
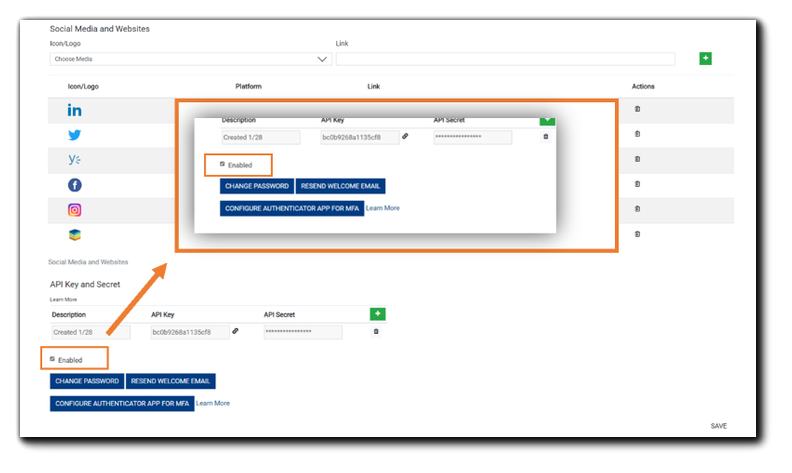
Click 'Save' in the lower right corner.
The User's disabled account will no longer appear in your Accounts listing.
Reactivating a Disabled Account
There may be circumstances when you need to reactivate a previously disabled User Account. If you have subscriptions available, your Portal Administrators may re-enable an account via the Accounts section from their Portal Dashboard.
Navigate to the Accounts section on your Portal Dashboard:

Select the magnifying glass on the Search field:
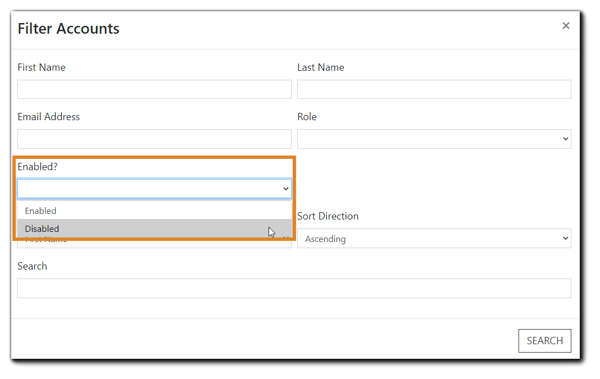
 From the Filter Accounts window, click on the drop-down menu titled, 'Enabled?' Select 'Disabled,' then click the 'Search' button.
A list of your Portal's Disabled User Accounts will appear. Select the User Account you wish to reactivate:

At the bottom left, select the 'Enabled' checkbox. Options to reset the User's password and/or resend the Account User Welcome Email will appear.

Note: The 'Change Password' and 'Resend Welcome Email' functions are optional.
Click 'Save' in the bottom right of the dialog to finish reactivating the User Account. Your User will have immediate access to your Portal.
Transferring an Account to a New User
If your personnel has changed and you need to transfer ownership of a User Account to a new employee, the transfer must be completed by EventBuilder. Email care@eventbuilder.com for assistance. Please send your change request via your email associated with your User Account.
Note: When transferring a User Account to a new employee, event data from the account is retained and then managed by the new User Account holder.
After EventBuilder has completed the change, the "Welcome to EventBuilder" email is triggered and sent to the new user, where they will be directed via link to set up a new password:

Upon creating their password, they will log into the portal, accept the Terms of Service when prompted. Your new user will have access to the Event data - past and future - the previous Organizer created.
Note: To ensure the success of Events the new user will now be managing, we recommend creating new Teams links for all upcoming scheduled Events and replace the existing links via the Schedule Step in your Event build. Once completed, inform any Presenters invited to Events outside of EventBuilder of the Teams URL change.
Note: All EventBuilder Portals are configured with 2-factor authentication. Your User will be prompted for a code to complete their login.
User Account Changes/Updates
Users (Organizers and Administrators) can access and update their individual account records to change and/or update selected information.
Note: Greyed-out fields on User Account record cannot be edited. Example shown in screenshot:

Changing Passwords
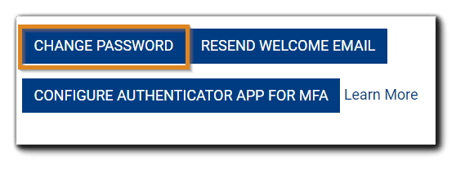
Click on the 'Change Password' button:
The following will appear:
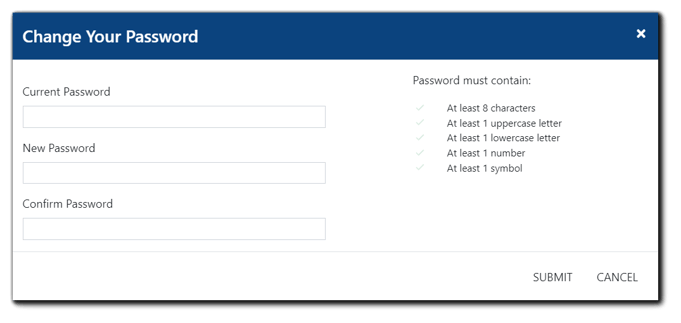
Enter the current password. Next, create a new password with at least:
-
-
- 8 characters
- One uppercase letter
- One lowercase letter
- One number
- One symbol
-
Note: The User will need their current password to complete the task.
Training
Your new User can refer to our Knowledge Base for information on how to get started. EventBuilder can assist your new User with software implementation and training, access to EventBuilder's Ask Me Anything webinars, or, if you would like to hire one of our Software Success professionals for one-on-one training, Contact Us for more information about your options.
Video Training: User Account Management

.png)