Streaming Event Pre-Conference Checklist
Last updated: April 27, 2023
Your 30-minute pre-event conference time is provided to allow Event staff to access the Teams room, navigate to the Moderator Console, queue presentation materials, test audio, and troubleshoot any issues ahead of the Event's start time.
Upon entering the Teams room and launching EventBuilder's Moderator Console, we recommend the following sequence of pre-conference tasks:
Let the Bot in From the Waiting Room, Mute
The EventBuilder bot is your connection from the Teams room to the Streaming Console. When the bot appears in the Teams Waiting Room, allow the bot into Teams and set it to "mute."
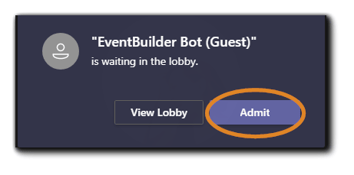
We recommend letting the bot into the Teams room early during the pre-conference time to verify it has joined the meeting. Performing this check early allows you to proceed with additional pre-conference checklist items well in advance of the Event's scheduled start time. Once you have verified the bot is in the Teams room, your Event is ready to go.
Note: Attendees cannot hear or see the Teams room audio/visual until you have started the stream from the Moderator Console. When Attendees arrive and launch their viewer, they will see the Opening Hold Image configured on the Communicate step in your Event build until you select 'Start Stream.'
Stream Previewer Audio Test
Navigate to the Console Previewer. Hover your mouse over the lower left corner to show the Volume Control tool.
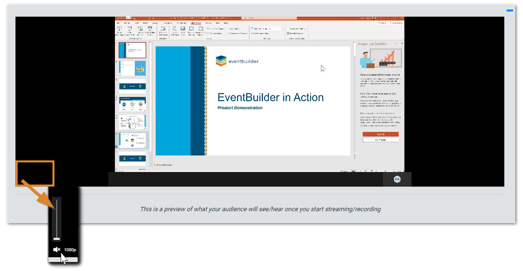
Unmute the volume control and test by speaking while connected to Teams.
Note: You will notice a slight delay between when you speak in the Teams room and when you hear your voice in the Previewer. This is normal and not noticeable to your Attendees. The Audio and Video streams are in sync. Keep this delay in mind as you are using the EventBuilder Engagement tools - give Attendees a few seconds to respond.
Delay the Stream
The bot is configured to start and end at the Event's scheduled times. Once the stream has begun, you cannot pause or stop the stream - doing so will end the Event permanently.
Assume control of your Event's start time by selecting 'Delay Stream 15 Minutes.'
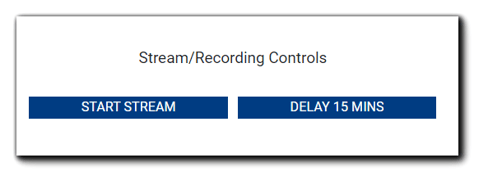
If you are ready to begin before the 15-minute delay is complete, click 'Start Stream' to initialize and begin your Event.
Check Presenter Audio and Screen Sharing
Test the Presenter's audio and screen sharing, both in the Teams room as well as the Console Previewer. Instruct your Presenter to speak into their microphone to test audio functionality. Next, have them load any slide deck being used and to share their desktop.
Queue Video Content (If Applicable)
For video content being played via desktop share, start the video in the Teams room and verify it is playing properly in the Console Previewer. Learn more about video playback options.
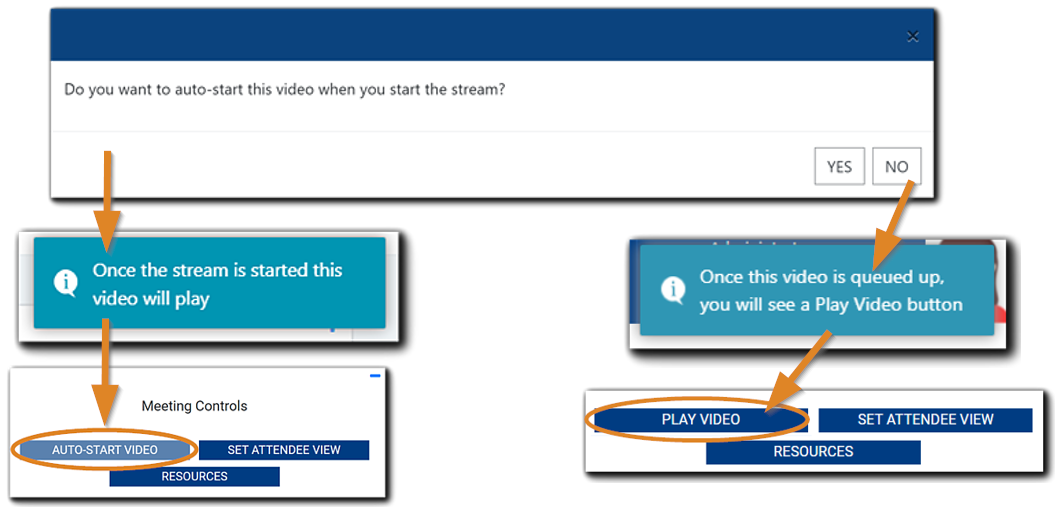
For video content uploaded to EventBuilder's file repository, verify the MP4 is available and select 'Queue Video.' The auto-start dialog will appear. 'A 'Yes' selection will set the video to play when the stream is started, and the button will read 'Auto-Start Video.' A 'No' selection will set the video to play later in the presentation, and the button will read 'Play Video.'

Note: Videos are stored in individual account user's File Repository. Because File Repositories are connected to individuals, the video must be queued by the User who uploaded the file.
Presenters or Moderators should log into the Portal using provided access credentials and upload their presentation video prior to the Live Event. Learn more about Guest Access.
Attendee Experience During Pre-Conference Time
The pre-event conference time allows for audio, video, and other technical checks, the preparation of presentation materials, and coordination of other Event activities.
Note: Attendees cannot see or hear the pre-conference checks.
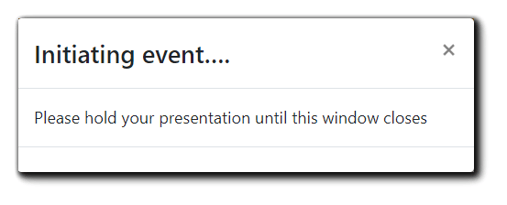
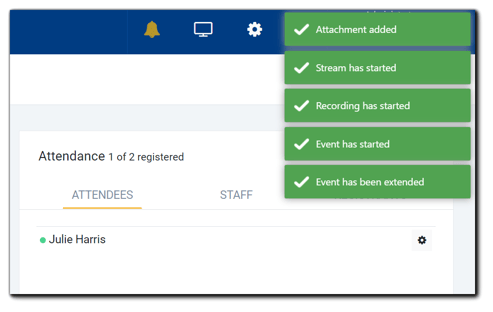
Attendees will see and hear the presentation through their viewing console only after the initialization has been completed and the stream has begun. The following notifications will appear in the Moderator Console to confirm:
Close unused apps and browser tabs to minimize distraction. Presenters should also close unused apps and tabs to assist with their bandwidth/resource management during their presentation.
After Stream Ends
Once 'End Stream' is selected, the bot will stop streaming content from the Teams room to the Attendee Viewing Console and the Closing Hold Image configured on the Communicate step in your Event build will appear. If post-event surveys are configured, they will appear as well.
Attendees will no longer see audio or video from the Teams presentation environment. For information on the Attendee experience, see Streaming Console: Attendee Experience.
Troubleshooting
See the Troubleshooting section in the Guide to EventBuilder Streaming Knowledge Base article.
Pre-conference Checklist
Launch Teams: Enter the designated Teams room
Launch Moderator Console: Located on Dashboard or Event List
Let the EventBuilder bot into the Teams room and mute: Verify bot is operating as expected
Verify Stream Previewer audio is operational: Unmute previewer audio, speak into Teams (Note: There is a slight delay)
Delay Stream: Take control of the Event start time - you may begin Event stream when ready
Check Presenter audio & screen sharing: Note: There will be a slight delay
Queue any video content: Select the 'Queue Video' button (if applicable)
Close unused apps/tabs: Helps manage Moderator and Presenter bandwidth/resources
After the Stream Ends: Attendees will no longer see/hear presentation
Troubleshooting: If unable to resolve, contact care@eventbuilder.com
EventBuilder's Care Team
EventBuilder can assist in troubleshooting any technical issues with streamed events. Our Care team is available Sunday 5:00 pm through Friday 5:00 pm Pacific Time. To request assistance, email care@eventbuilder.com

.png)